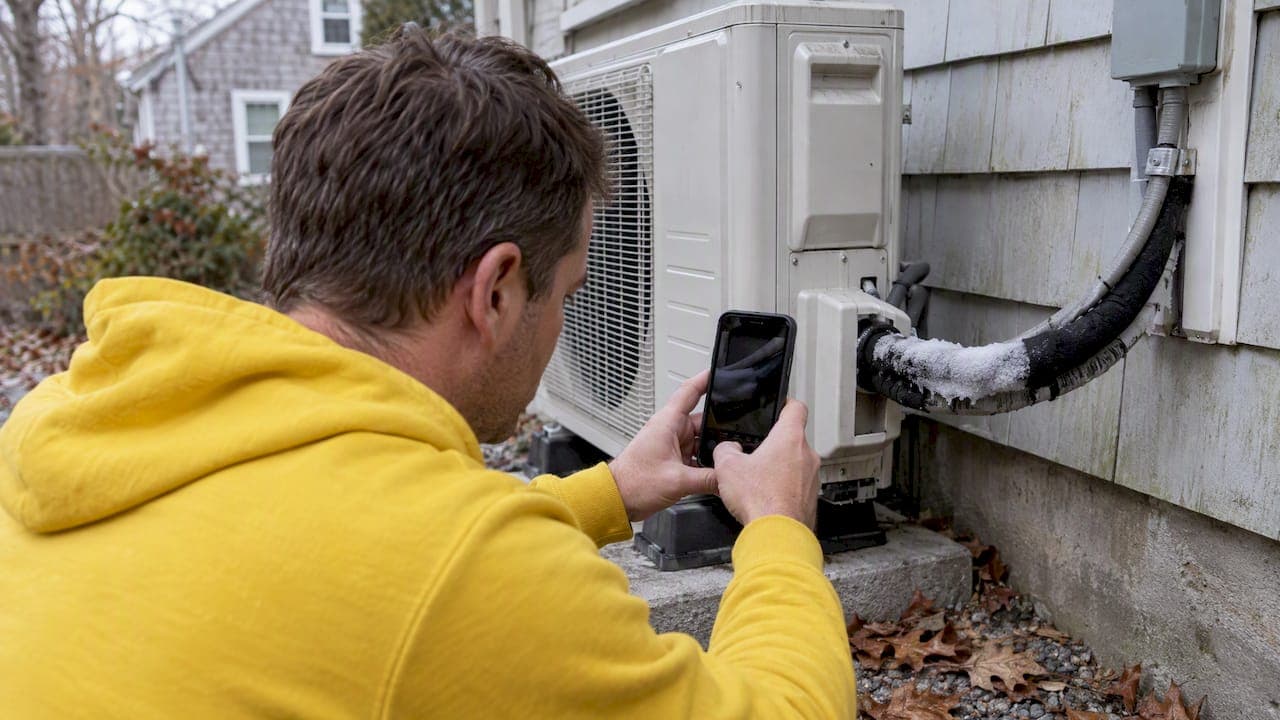
If your air conditioner is hissing and the evaporator coil has ice on it, you very likely have a refrigerant leak and should shut the system off and call a certified technician. Hissing paired with warm air from the vents points the same way. Refrigerant does not simply run low on its own in a sealed system, so any drop in level means it is escaping somewhere.
TL;DR:
- A refrigerant leak often causes hissing sounds, ice on coils, warm vents, oily stains, and increased energy bills, especially when multiple signs occur together.
- DIY checks should focus on replacing filters, clearing obstructions, inspecting outdoor lines for oil stains, and testing fittings with soap water; avoid handling refrigerant directly.
- Confirmed leaks require electronic detection, dye tracing, or nitrogen testing by certified technicians, followed by verified repairs and documentation for compliance.
- Repair costs vary from a few hundred dollars for accessible fittings to over $2,700 for hidden coils, with pricing influenced by leak location, access difficulty, and refrigerant type.
- Replacing older systems using obsolete refrigerants may be more cost-effective than repeated repairs if multiple leaks or system age suggest imminent replacement.
Table of Contents
- Top signs of a refrigerant leak
- Safe homeowner checks you can do without touching refrigerant
- How professionals locate and verify refrigerant leaks
- Repair cost scenarios and what drives price
- Regulatory and safety essentials homeowners should know
- Prevention and maintenance steps to reduce leak risk
- Why trust this guidance: Mystic Valley Services and the author
- When to repair vs. replace: a short homeowner decision checklist
- How Mystic Valley Services can help with leak diagnosis and repair
- FAQ
- Sources
Top signs of a refrigerant leak
Some signs are loud and obvious, others show up slowly as your energy bill creeps up. Here is how we rank them by reliability, from the clearest indicator to the ones that only matter in combination with something else.
- Hissing or bubbling near the lines or fittings. A steady hiss or bubbling sound close to the refrigerant lines or the outdoor unit usually means gas is escaping under pressure through a small hole or loose connection.
- Warm air from the vents despite correct thermostat settings. When refrigerant drops, the system loses its ability to absorb heat from indoor air, so it blows air that feels barely cooler than room temperature even when everything is set correctly.
- Ice or frost on the evaporator coil or exposed lines. Low refrigerant pressure drops the coil's surface temperature below freezing, which pulls moisture out of the air and turns it to ice, a mechanism confirmed in refrigerant guidance from the Department of Energy. That ice then restricts airflow further, which can make cooling performance drop even faster.
- Oily residue or wet spots at connections and service ports. Refrigerant circulates with a small amount of oil, so a leak often leaves a faint oily film or dark stain right at the fitting where gas is escaping.
- Uneven cooling, rising humidity, and climbing energy bills. A system low on refrigerant runs longer to reach the same temperature, which shows up as one room staying warmer than another, stickier indoor air, and a higher electric bill for the same usage pattern.
A single sign, especially a modest bill increase or one warm room, can have other causes like a dirty filter or a closed vent. Two or more signs together, particularly hissing with ice, or warm vents with visible oil stains, are a much stronger indicator that refrigerant is the actual problem.
Ice on a coil is a symptom, not the cause. Department of Energy guidance notes that low refrigerant pressure lowers coil temperature and produces that ice, which means thawing the coil without finding and sealing the leak just brings the same problem back within days.
It also helps to remember that a sealed HVAC system does not lose refrigerant through normal use. Any measurable drop in refrigerant level confirms a leak exists somewhere in the closed loop, which is why "topping off" the system without finding the leak rarely solves anything for long.
Safe homeowner checks you can do without touching refrigerant
Before you assume the worst, rule out the simple stuff. A clogged filter or a closed vent can mimic several refrigerant symptoms, and ruling those out first can save you a service call.
- Check the air filter and replace it if it looks gray or clogged, since restricted airflow alone can cause warm vents and even coil icing.
- Walk through the house and confirm every supply vent and return grille is open and not blocked by furniture or curtains.
- Walk the outdoor unit and any exposed line set, looking for oil stains, corrosion, or damaged insulation along the copper lines.
- Mix a few drops of dish soap with water and dab it on accessible fittings; bubbling or foaming at a joint signals an active leak at that spot.
- Stop running the system if you see visible ice on the lines, hear a loud or constant hiss, or notice the outdoor unit struggling and overheating.
The soapy-water test only works on leaks you can reach safely, like exposed fittings on the line set outside. Manufacturer troubleshooting guidance from Trane lists this same visual-and-soap approach as the extent of what homeowners should attempt themselves.
Pro Tip: Snap a photo of any oil stains or ice buildup before you call for service. It helps the technician narrow down the likely leak location before they even arrive.
Never open a refrigerant line, attach a gauge set, or attempt to add refrigerant yourself. Refrigerant is regulated, pressurized, and can cause frostbite or asphyxiation in an enclosed space, and tampering with the system without certification can also violate federal rules covered later in this guide.
How professionals locate and verify refrigerant leaks
A technician's first job is confirming there is actually a leak rather than a different fault producing similar symptoms. Building science diagnostic guidance notes that restricted airflow, a failing expansion valve, or trapped air in the system can all mimic low refrigerant, which is why a systematic sequence of tests matters more than guessing from symptoms alone. Our guide to TXV failures walks through one of the more common look-alike problems.
Once a leak is suspected, technicians typically work through these steps:
- Electronic leak detection. A handheld sniffer is passed along lines, coils, and fittings to pinpoint where refrigerant gas is escaping.
- UV dye tracing. A fluorescent dye is added to the system, circulated, and later checked with a UV light to reveal the exact leak point, which is especially useful for slow or intermittent leaks that take days to show up.
- Nitrogen pressure or soak testing. The system is pressurized with inert nitrogen and monitored for a pressure drop over time, confirming a leak exists and roughly how fast it is losing charge.
Intermittent or slow leaks can require extended pressure holds or dye that needs days to circulate before it surfaces, so a single short test can miss them entirely.
An initial test confirms the leak and its location; a follow-up verification test after the repair confirms the fix actually held. EPA guidance on Section 608 technicians notes that documented verification should follow any repair, so ask your technician what method they used and what the results showed before you consider the job closed.
Repair cost scenarios and what drives price
Cost depends heavily on where the leak is and how hard it is to reach. Cost data from PICKHVAC breaks typical residential repairs into a few rough scenarios.
| Scenario | Typical cost range | What drives the price |
|---|---|---|
| Accessible line or valve repair | A few hundred dollars | Easy access, minimal labor, common refrigerant |
| Concealed evaporator coil repair | $1,200 to $2,700 or more | Cabinet removal, attic or ceiling access, parts cost |
| Coil or line-set replacement, older refrigerant types | Highest of the three | Full replacement labor, refrigerant type, disposal |
Repairing a hidden coil often means pulling apart the air handler cabinet, which PICKHVAC notes can pull in extra labor and even other trades if attic access is involved. When you get a quote, ask for it itemized: diagnosis fee, leak repair itself, system evacuation, refrigerant charged per pound, and the verification test, so you can see exactly what you are paying for.
Regulatory and safety essentials homeowners should know
Refrigerant work is not a DIY category, and federal rules back that up.
- Only EPA Section 608 certified technicians may legally purchase, handle, or recover refrigerant, so never attempt to add it yourself.
- Starting January 1, 2026, updated EPA leak-repair rules tighten leak-rate calculations and repair and verification timelines for certain appliances and refrigerants, which means some systems now face stricter deadlines for getting a confirmed leak fixed.
- Ask for documentation showing the detection method used, the repair performed, and the verification test results, since this paperwork is your proof the job meets the current standard.
Clear documentation protects you if the same unit leaks again later and also matters if you ever sell the home and a buyer's inspector asks about system history.
Prevention and maintenance steps to reduce leak risk
Most leaks develop slowly at joints, fittings, and coil seams that vibrate or corrode over years, so routine maintenance is your best defense.
- Replace filters on a regular schedule and keep the outdoor condenser clear of leaves, grass clippings, and debris.
- Schedule a seasonal tune-up where a technician checks refrigerant pressure and looks for early signs of a developing leak.
- Treat repeated leaks in the same system as a signal to discuss replacement rather than repairing the same spot again.
- Have ductwork and airflow checked periodically, since restricted airflow can look like a refrigerant problem and lead to an unnecessary leak search.
Pro Tip: Keep at least two feet of clearance around your outdoor unit. Crowding it with plants or storage raises operating pressure and stresses fittings over time.
Why trust this guidance: Mystic Valley Services and the author
This guide draws on homeowner-focused HVAC and plumbing experience, built around the diagnostic sequence technicians actually use rather than guesswork. Our posts on troubleshooting an AC that will not cool and catching commercial HVAC failures early cover the same practical, step-by-step approach to narrowing down a system problem before calling for service.
When to repair vs. replace: a short homeowner decision checklist
Repairing an aging system that still uses older refrigerant types often costs more than it is worth once you factor in a short remaining lifespan. If a quoted repair starts approaching a large share of what a new system would cost, replacement usually makes more financial sense than chasing another leak later.
Before approving major work, ask for an itemized cost breakdown, a verification test after the repair, and clear warranty terms on both parts and labor. If a quote feels vague or the technician cannot explain the leak location, a second opinion is a reasonable ask, not an insult.
— Matt
How Mystic Valley Services can help with leak diagnosis and repair

A refrigerant leak rarely announces itself clearly, and running the system while you wait only risks compressor damage on top of the original problem. The diagnostic sequence described above, from electronic leak detection through nitrogen pressure testing, helps provide a confirmed answer instead of a guess.
A typical service visit involves visual and electronic inspection of coils, lines, and fittings to find the leak source, verification testing after repair to confirm the fix, and providing an itemized, upfront quote before work begins.
If your AC is showing any of the signs above, our cooling services page covers AC diagnostics and repair, ductless mini-split service, and seasonal tune-ups, and you can schedule a diagnosis visit directly from there.

FAQ
How expensive is it to fix a refrigerant leak?
Cost depends mostly on where the leak is: an accessible fitting repair often runs a few hundred dollars, while a concealed evaporator coil repair can run $1,200 to $2,700 or more. Always ask for an itemized quote covering diagnosis, repair, evacuation, and refrigerant charge separately.
Is it safe to be in a house with a refrigerant leak?
Most residential refrigerants pose a low risk in small, well-ventilated amounts, but a leak can still cause dizziness or breathing discomfort if it collects in an enclosed space. If you smell a strong chemical odor or feel lightheaded near the unit, ventilate the area, shut the system off, and call a technician rather than investigating further yourself.
Where is the most common place for a Freon leak?
Leaks most often develop at joints, valve fittings, and the evaporator coil, where vibration, corrosion, or manufacturing seams gradually wear through metal or seals. Manufacturer guidance points to these same spots as the first places a technician checks during inspection.
Can AC lose refrigerant without a leak?
No. A sealed air conditioning system does not consume or use up refrigerant through normal operation, so any drop in level means refrigerant is escaping somewhere in the closed loop. If your system is low, a leak is the explanation even if you have not found the exact spot yet.