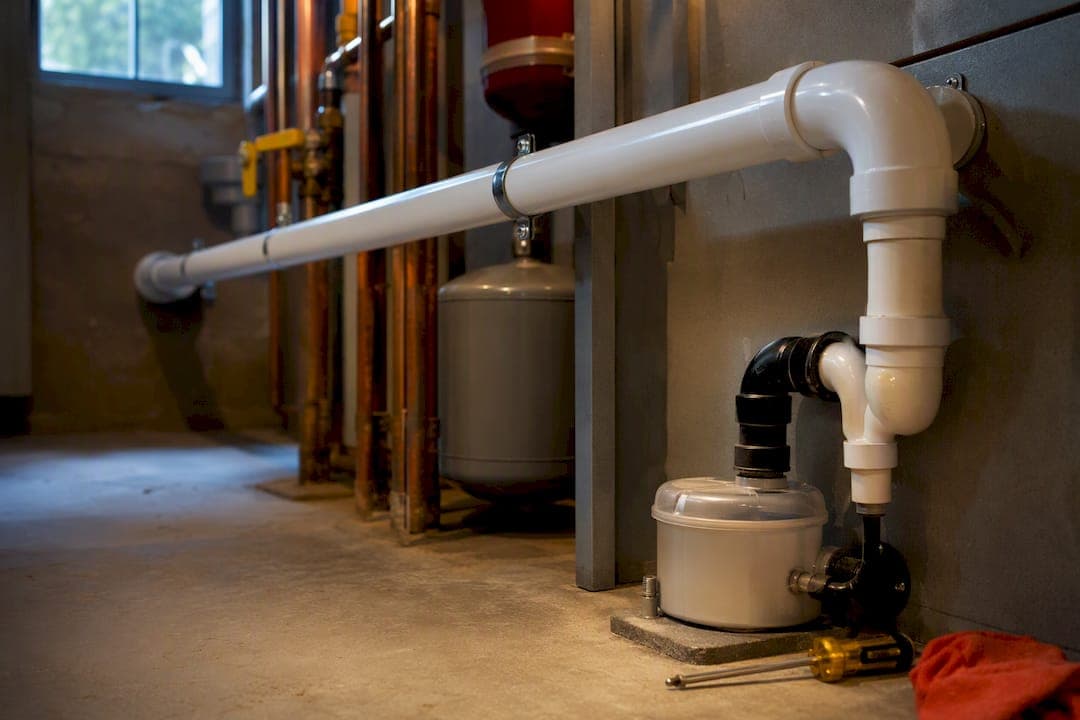
Safe condensing boiler venting comes down to four things: keep the termination clear of windows and air intakes, pitch the vent so condensate drains back toward the unit, install a serviceable condensate trap with proper drainage, and use only UL-listed materials rated for your appliance's category. If any part of the job involves a roof penetration, a condensate pump, or more than one boiler sharing a vent, bring in a licensed installer before you touch anything.
TL;DR:
- Proper vent placement requires at least 4 feet clearance from windows and air inlets, with a minimum height of 12 inches above grade or snow level.
- Vent piping must be pitched at 1/4 inch per foot toward the termination, with a removable condensate trap installed below the exhaust manifold and routed to an appropriate drain.
- Use only UL-listed materials rated for the specific boiler category, and confirm pipe size and support spacing according to manufacturer and NFPA 54 standards.
- Avoid installing a vent in corners, under decks, or where wind recirculation could cause icing or staining, and never add natural-draft components like dampers to a condensing system.
- Jobs involving roof penetrations, multiple boilers sharing a vent, or condensate pumps should be handled by a licensed professional to ensure code compliance and safety.
Table of Contents
- Why condensing boilers vent differently than standard models
- How far your vent termination must be from windows and vents
- Getting the vent slope and condensate drain right
- Materials and code references worth checking before you install
- Spotting and fixing common venting mistakes
- When to call a licensed technician and how to vet one
- Why exhaust heat recovery rarely makes sense here
- Getting your venting done right the first time
- Sources
- FAQ
Why condensing boilers vent differently than standard models
A condensing boiler pulls extra heat out of its exhaust gas, which drops the flue temperature low enough that water vapor condenses inside the vent instead of leaving as a plume. That condensate is mildly acidic, so it can corrode standard metal flues and needs a real drainage path instead of just an open pipe outside. Combustion also happens under mechanical draft rather than natural buoyancy, so the vent has to hold pressure without leaking exhaust into living space.
Common venting options include:
- PVC or CPVC pipe for lower-temperature sidewall venting on many residential condensing units.
- Polypropylene systems, often used where flue temperatures run higher or local code requires it.
- Stainless steel concentric or dual-pipe systems that separate intake air from exhaust in one assembly.
Appliance category matters here. Category II and IV boilers operate at negative or positive pressure with condensing flue gas, and that combination requires vent pipe specifically listed for that use. You cannot swap in generic drain pipe or an old furnace vent and expect it to hold up or pass inspection.
How far your vent termination must be from windows and vents
Placement rules exist to keep exhaust and condensate away from anything that breathes, opens, or drains. Manufacturer guidance built around these clearances gives you a starting checklist:
- Keep terminations at least 4 feet below, 1 foot above, or 4 feet horizontally from windows, doors, and gravity air inlets, per manufacturer venting specifications.
- Maintain at least 3 feet of separation above forced-air inlets located within 10 feet of the termination.
- Position the bottom of the termination a minimum of 12 inches above grade or the expected snow line.
- On roof terminations, follow the manufacturer's minimum height above the roof and above nearby structures, and add lateral support if the vent run extends beyond standard bracket spacing.
Beyond the numbers, think about where the plume actually lands. A termination aimed at a walkway, a gas meter, or a corner where wind swirls can create staining, icing, or a nuisance discharge that a technician will get called back to fix.
Pro Tip: Avoid tucking a termination into an inside corner or under a deck, wind recirculation there causes more icing and staining complaints than almost any other placement mistake.

Getting the vent slope and condensate drain right
Pitch is not optional on a condensing vent. Manufacturer guidance commonly calls for pitching the vent upward toward the termination at 1/4 inch per foot, so condensate flows back to the appliance instead of pooling in a low spot. Some installers use a shallower 1/8 inch per foot on very short PVC runs, but when in doubt, follow the appliance manual and lean toward the steeper spec, especially on longer runs where condensation risk is higher.
At the boiler end, a removable condensate trap sits below the exhaust manifold and routes water through flexible plastic hose to a drain. Key points to get right:
- Keep the trap removable rather than hard-piped, since it needs periodic cleaning.
- Route condensate to a suitable drain, and add a sump and pump when the drain sits above the trap outlet.
- Never let the vent itself act as a drain line, condensate belongs in the trap and hose assembly, not pooling in the pipe.
Manufacturer documentation puts condensate pH around 3.0 to 3.2, acidic enough that some local codes require a neutralizer before discharge. On larger units, condensate flow can reach several gallons per hour, so drain and trap sizing has to match the appliance, not just whatever fitting happens to be on hand.
Materials and code references worth checking before you install
Every piece of vent pipe on a condensing boiler should carry a listing that matches the appliance's category. Category II and IV appliances are not interchangeable with standard Category I'm venting, and mixing listings is one of the fastest ways to fail an inspection.
NFPA 54, also published as ANSI Z223.1, is the reference most installers use for sizing and clearance rules, but it works alongside, not instead of, the manufacturer's own vent kit instructions for penetrations and supports.
Before signing off on a job, confirm:
- The pipe type and diameter match what the manufacturer specifies for that model.
- Any wall or roof penetration uses a listed thimble or double-wall firestop where the vent passes through combustible material.
- Supports are spaced to prevent sagging, since a straight run downstream of the exhaust manifold is often required.
- The vent is not tied into another manufacturer's system or shared with an incompatible appliance.
Spotting and fixing common venting mistakes
Most venting complaints trace back to a short list of errors: incorrect pitch, a sagging run that creates a low spot, a barometric or draft damper bolted onto a system that was never designed for one, or a termination placed where wind and cold air conspire to freeze it shut.
- Ice forming around the termination: check the pitch first, then confirm clearances from cold surfaces and wind pockets.
- Brick or siding staining near the vent outlet: extend the termination further from the wall or relocate it away from the corner catching the plume.
- Reduced heat output or nuisance shutdowns: look for a blocked or partially iced termination and clear it before restarting the boiler.
- Water pooling inside the vent: recheck slope along the entire run, not just near the boiler, a single sagging section anywhere in the line can trap condensate.
Pro Tip: Never add a barometric damper or draft hood to a condensing boiler, these devices are built for natural-draft appliances and interfere with the sealed mechanical draft a condensing system depends on.
When to call a licensed technician and how to vet one
Some jobs are within a handy homeowner's reach. Others are not. Roof penetrations, permitted installations, multi-boiler manifolds, condensate lift pumps, and neutralization systems all call for a licensed technician who can interpret code correctly and follow the manufacturer's specific vent kit.
Before hiring, ask a contractor:
- Which UL-listed vent materials they plan to use for your appliance category.
- How familiar they are with NFPA 54 and ANSI Z223.1 clearance requirements.
- What their condensate handling plan looks like, including trap access and drain routing.
- Whether they pull permits and schedule the required inspection.
- For examples of similar condensing boiler installs they have completed.
Mystic Valley Home Services works on boiler and furnace repair, heating tune-ups, and high-efficiency boiler installation across Massachusetts, and a boiler and water heater safety check is a practical way to confirm your venting and condensate system meets these standards before winter.
Why exhaust heat recovery rarely makes sense here
Pulling additional heat out of an already-condensing exhaust stream sounds efficient, but the practical obstacles are real. The exhaust is already cool and loaded with acidic condensate, and added heat-recovery hardware introduces material compatibility problems that typically outweigh the energy gained unless an engineer designs the system specifically for that appliance. If efficiency is the goal, better system controls or a higher-efficiency boiler with its own approved vent kit is a safer path than modifying an existing exhaust run.
— Matt
Getting your venting done right the first time
If reading through clearances, pitch specs, and condensate pH numbers has you thinking this is more than a weekend project, that instinct is correct. A family-owned contractor in Massachusetts offers appointments with quick scheduling, upfront pricing before work starts, and direct owner oversight on every job, including venting and condensate work.

We handle high-efficiency boiler installation from initial vent design through final inspection, and our technicians bring practical experience with the older homes common throughout Arlington, where roof penetrations and tight sidewall clearances often complicate a straightforward install elsewhere. If your current system shows icing, staining, or a condensate leak, a boiler and water heater safety check will tell you exactly what needs fixing before a small venting issue turns into a no-heat emergency. Reach out through our heating services page to schedule a visit.
Sources
This article draws on manufacturer venting guides, NFPA 54 and ANSI Z223.1 clearance standards, and combustion damper guidance. Always confirm final specs against your specific appliance manual.
- CFR Boiler Pre-Install Venting & Combustion Air Design Guide (AERCO)
- Field Controls — Combustion dampers guidance
FAQ
What are the venting requirements for a boiler?
Venting requirements depend on the boiler's category, but condensing models generally need UL-listed pipe, a vent pitched upward toward the termination, and a termination clear of windows, doors, and air intakes. Manufacturer guidance sets specific clearance distances, such as 4 feet horizontally from a window or gravity air inlet, and the appliance manual has final authority over material and sizing choices.
What are the disadvantages of a condensing boiler?
Condensing boilers produce acidic condensate that requires a dedicated trap, drain, and sometimes a neutralizer before discharge, adding complexity compared to a standard boiler's venting. They also depend on specific UL-listed vent materials and precise pitch, so installation mistakes show up faster as icing, staining, or nuisance shutdowns.
Where should I discharge condensate from my boiler?
Condensate should route from the boiler's trap through flexible hose to an approved drain, such as a floor drain, utility sink, or condensate pump discharge point, following local plumbing code. When the drain sits above the trap outlet, a sump and pump sized for the appliance's expected flow moves the condensate up and out.
Does a boiler need a vent?
Yes, every gas-fired boiler needs a vent to safely remove combustion byproducts, and a condensing boiler's vent additionally has to handle liquid condensate and operate under mechanical draft rather than natural draft. Skipping proper venting or improvising with unlisted materials risks combustion gas leaks and does not meet code.