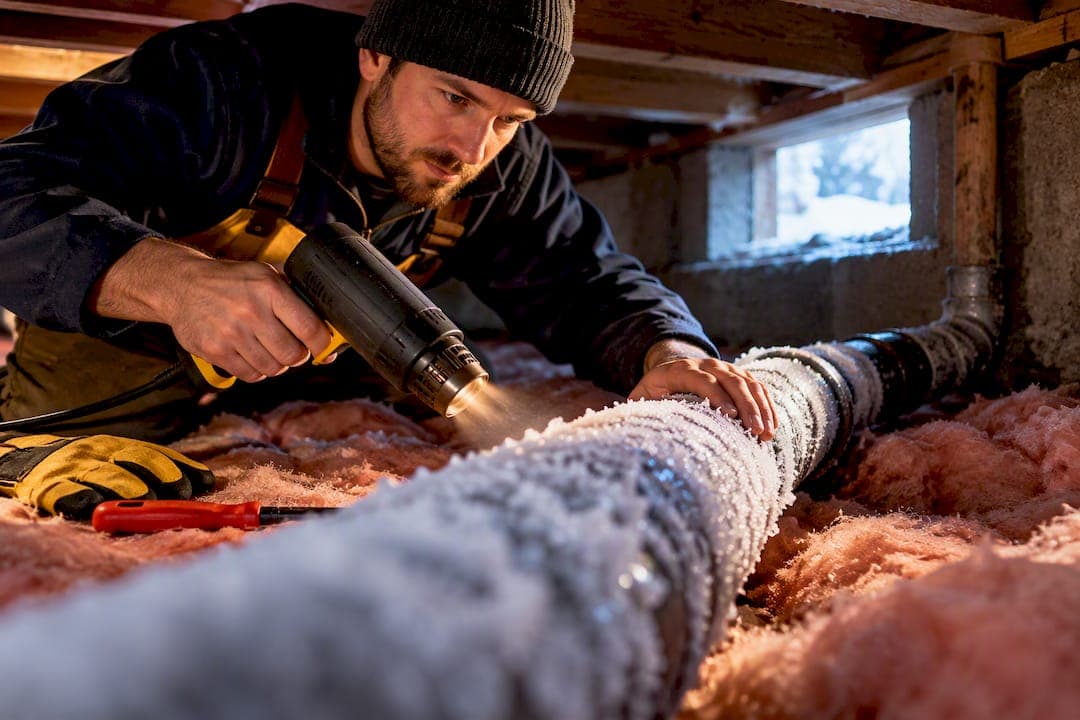
Four moves prevent almost every frozen pipe: keep the house heated to at least 55°F, insulate and air-seal the pipes exposed to cold, disconnect outdoor hoses before the first hard freeze, and let vulnerable faucets drip when the temperature drops. Do those four things and you eliminate most of the risk. Skip any one of them during a real cold snap and you're gambling on a repair bill that often runs into the thousands.
TL;DR:
- The most effective way to prevent frozen pipes involves maintaining indoor temperatures above 55°F, especially in unheated areas exposed to outdoor elements.
- Insulating exposed pipes and sealing air leaks around penetration points reduce risks, but air sealing is often more crucial than insulation alone.
- Dripping faucets slightly, especially those on exterior walls, helps keep water moving and resists freezing during cold snaps.
- Regular maintenance, including mapping vulnerable pipes and testing shut-off valves, can prevent recurring freeze issues and reduce emergency repairs.
- In case of a freeze, applying controlled electric heat from the accessible end and monitoring for leaks or cracks minimizes damage risk, with professional help advised for persistent problems.
Table of Contents
- Quick Frozen Pipes Prevention Checklist for Right Now
- How to Prepare Your Home's Plumbing Before Winter Hits
- What to Do During Extreme Cold to Keep Pipes Safe
- Safe Thawing Steps When a Pipe Freezes or Water Slows to a Trickle
- Long-Term Fixes Pros Recommend for Chronic Freeze Risk
- A typical thaw-and-prevent checklist for frozen pipes from the field
- Why Insulation Alone Won't Save You (An Editorial Take)
- Stop Guessing and Get a Winter-Ready Plumbing Check
- Sources
- FAQ
Quick Frozen Pipes Prevention Checklist for Right Now
If a cold front is rolling in tonight, you don't have time for theory. Work through this list in order, starting with the cheapest, fastest actions.
- Set the thermostat to at least 55°F and leave it there, even if you're heading out of town.
- Open cabinet doors under kitchen and bathroom sinks so warm room air reaches the supply lines.
- Let faucets on exterior walls or unheated spaces drip slightly, hot and cold sides both.
- Close garage doors, but crack any interior door leading from the garage to the house if pipes run through it.
- Disconnect garden hoses, drain them, and shut off the exterior spigot's interior valve if one exists.
- Insulate exposed spigots, meter boxes, and backflow devices with foam covers or wrap, a step municipal utilities consistently flag as a top outdoor priority in their frozen-pipe prevention guidance.
Keep a small kit on hand before you need it: foam pipe sleeves, a roll of UL-listed heat tape, a couple of old towels, and a hair dryer. None of it costs much, and all of it is useless if you're shopping for it during a blizzard.
Pro Tip: Photograph your exposed pipe runs now, while everything's dry and normal. If something bursts later, you'll have a clear "before" picture for the insurance adjuster and a mental map of where the trouble spots are.
Call a licensed plumber before the freeze, not during it, if you've got pipes buried in a wall you can't access, a history of freezing in the same spot every winter, or you're considering heat-trace cable and aren't sure how to size or install it. Recurring freezes in the same location almost always point to a structural gap, not bad luck.
How to Prepare Your Home's Plumbing Before Winter Hits
The prep work that actually matters happens weeks before the first freeze warning, not the night of it. Start by walking your house and identifying every pipe run that sits outside the heated envelope: attic lines, crawlspace runs, anything in an exterior wall, and garage plumbing. Those are your priority list, in that order.
- Map the vulnerable runs. Get a flashlight and check the attic, crawlspace, and basement for any visible pipe. Note which ones sit close to an outside wall or a vent that lets outdoor air in.
- Insulate with the right materials, not just any wrap. Foam pipe sleeves sized to the pipe diameter work better than loosely wound wrap because they create continuous coverage without gaps at the joints. The Department of Energy recommends insulating the first six feet of both hot and cold lines at the water heater, but keep insulation at least six inches clear of the draft diverter and any single-wall flue, since blocking this creates a different hazard entirely.
- Seal the air leaks that let cold in by following simple steps to winterize your doors. Caulk gaps around pipe penetrations, seal the sill plate where it meets the foundation, and fix any broken basement windows. This step gets skipped constantly, and it's arguably more important than the insulation itself, since insulation only slows heat loss, it doesn't generate any.
- Find and test your main shut-off valve. Locate it, turn it a quarter turn and back to confirm it moves freely, and make sure everyone in the house knows where it is. Also locate any exterior or secondary shut-offs for outdoor spigots.
- Drain exterior lines and sprinkler systems. Shut off the water supply to any irrigation system, then use the system's drain valves or an air compressor to clear remaining water from the lines before the ground freezes solid.
A vented crawlspace is one of the riskiest spots in a typical house, because it's often colder than the ambient outdoor temperature once wind gets underneath the house. Insulation alone won't save a pipe there. It needs air sealing at the vents, or a heat source, to keep from eventually matching outside temperatures no matter how well it's wrapped.
Cold fronts move faster than people expect. Temperatures can drop below freezing within hours of a front's arrival, which is exactly why vacant or lightly heated properties see the most freeze damage during rapid cold snaps rather than during a slow, predictable deep freeze. If you're managing a second home or a rental, that fast-onset risk is the argument for keeping heat running continuously rather than cycling it on right before a storm.
Add these prep steps to a running seasonal checklist rather than a one-time fall project. A written home plumbing maintenance checklist makes it far more likely you actually repeat the insulation check and shut-off test every year instead of remembering only after something goes wrong. For a fuller walk-through of Massachusetts-specific winterizing steps, a detailed winter plumbing prep guide covers the exterior and interior tasks in more depth than a checklist alone can.
What to Do During Extreme Cold to Keep Pipes Safe
Preparation gets you most of the way there, but active cold snaps call for a few short-term adjustments you make and then reverse once temperatures climb back above freezing.
Keep the thermostat steady rather than letting it swing. The Red Cross recommends never dropping below 55°F when a home will be vacant or during a serious cold spell, and that number isn't arbitrary. It's the buffer that keeps interior wall cavities and unheated closets from tracking down toward freezing even when the thermostat sensor itself reads warmer. If you're leaving town for a few days during a cold week, this is the one setting you don't compromise on to save money.
Drip only the faucets that actually serve exposed or vulnerable pipes, not every tap in the house. A small trickle is sufficient to keep water moving and resist freezing. Running both hot and cold sides slightly keeps water moving through the line, and moving water resists freezing far better than water sitting still. It also relieves pressure buildup between a closed faucet and any ice forming somewhere upstream, which is part of what causes pipes to split in the first place.
If you're leaning on a space heater in a crawlspace, garage, or basement to protect pipes, follow the rules that keep it from becoming the bigger problem:
- Plug it directly into a GFCI-protected outlet, never into an extension cord or power strip.
- Keep it at least three feet from insulation, boxes, wood framing, or anything flammable.
- Never leave it running unattended overnight in a space you can't check on periodically.
- Never place it directly under exposed foam pipe insulation, since some foam products aren't rated for direct heat exposure.
Leave interior cabinet doors open under sinks on exterior walls so household heat can actually reach the pipe. Garage doors should stay closed to hold in whatever ambient warmth exists, but if a supply line runs through the garage, prop the interior door open a few inches so heat drifts through. It's a small adjustment that costs nothing and meaningfully changes the temperature around that pipe run.
Safe Thawing Steps When a Pipe Freezes or Water Slows to a Trickle
A frozen pipe usually announces itself before it bursts. If one faucet suddenly produces a weak trickle or nothing at all while others in the house work fine, you likely have a freeze somewhere between the shut-off and that fixture.
- Open the affected faucet first. Leave it open so that once the ice starts to melt, water has somewhere to go and steam or pressure doesn't build up behind the blockage.
- Check accessible sections for frost, bulging, or dampness. Walk the visible pipe run in the basement, crawlspace, or under the sink and look for a frosted section, a swollen spot, or water already leaking. A bulge is a serious warning sign that the pipe may already be compromised.
- Find your main shut-off before you do anything else if you see a burst or active leak. Shutting off the main immediately limits water damage while you sort out the frozen section.
- Apply heat only with electric sources, starting from the open faucet end and working toward the blockage. A hair dryer on a low or medium setting, an electric heating pad wrapped around the pipe, or towels soaked in hot water all work. Never use a propane torch, camp stove, or any open flame near a pipe, since it's a fire risk and can also damage the pipe material itself.
- Restore water slowly once flow returns, and inspect every joint and fitting along that run for drips. A pipe that froze hard enough to block flow may have a hairline crack that only shows up once full pressure returns.
Pro Tip: Keep the faucet open the entire time you're applying heat. If you seal the far end of a pipe while ice is trapped between two closed points, you can actually build pressure and cause a burst you were trying to avoid.
Call a licensed plumber immediately if you spot a visible crack or bulge, if water is actively leaking anywhere along the run, or if multiple fixtures throughout the house have lost pressure at once, since that suggests a freeze in a main line rather than a single branch. Document anything damaged with photos before cleanup starts. Many homeowner policies expect reasonable care to maintain heat in an unoccupied home to honor a freeze-related claim, so that documentation matters more than people expect at claim time. If the situation is beyond a DIY fix, knowing what to expect from an emergency plumbing response ahead of time makes the call easier to make quickly instead of hesitating while water keeps leaking.
Long-Term Fixes Pros Recommend for Chronic Freeze Risk
Some pipes freeze every single year no matter how carefully you drip faucets and crack cabinet doors. That's a sign the fix needs to be structural, not seasonal.
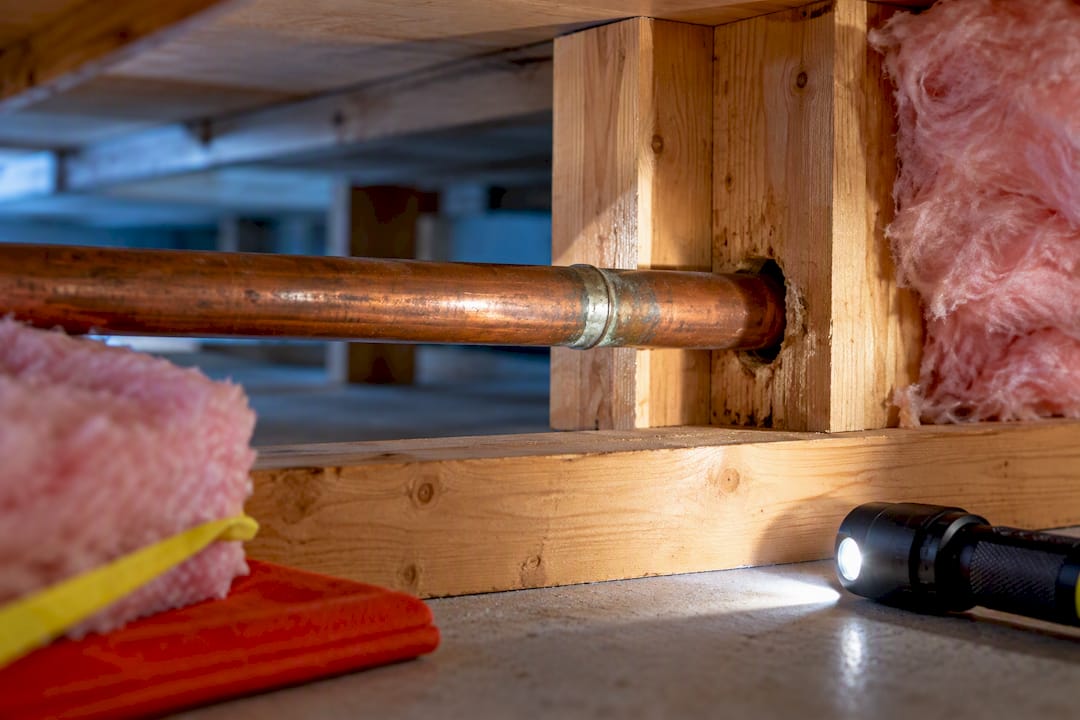
Heat-trace cable, sometimes called heat tape, wraps directly around a pipe and switches on automatically as temperatures drop. Get this right and it solves chronic freezing permanently. Get it wrong and it's a fire hazard. Industry guidance is specific: the cable must be UL-listed with a built-in thermostat, and you should never overlap wraps of cable unless the manufacturer's instructions explicitly allow it, since overlapping can cause the cable to overheat. A licensed installer will also check pipe supports and clear away any combustible insulation before running the cable, details a DIY install often misses.
Other durable options worth discussing with a contractor:
- Rerouting pipes away from exterior walls and into conditioned interior space, eliminating the freeze risk at that location entirely rather than managing it every winter.
- Insulating basement or crawlspace walls rather than just the pipes themselves, which raises the ambient temperature of the whole space.
- Automatic shutoff or excess-flow devices that sense a sudden spike in water flow, the signature of a burst pipe, and cut supply before major flooding happens. These matter most for vacation homes or rental properties where nobody's around to notice a leak for days.
- A basement or crawlspace temperature sensor that sends an alert if the space drops toward freezing, giving you a warning window before a pipe actually fails.
One detail that catches homeowners off guard: upgrading to a high-efficiency furnace or boiler can change the freeze math in your own house. Older, less efficient systems often threw off enough incidental heat to keep marginal pipe locations safe by accident. A tighter, more efficient system doesn't waste that heat, which means a pipe that was fine for fifteen years can suddenly start freezing the winter after an HVAC upgrade. That's worth a quick plumbing reassessment any time you replace major heating equipment.
A typical thaw-and-prevent checklist for frozen pipes from the field
When our technicians get a frozen-pipe call, the plan follows a consistent order: isolate the main, apply controlled heat only from the accessible end toward the blockage, check every joint and fitting once flow returns, and then keep the system under observation for a stretch of time before calling the job done. That final observation period matters because a hairline crack from freezing doesn't always leak the moment water starts moving again.
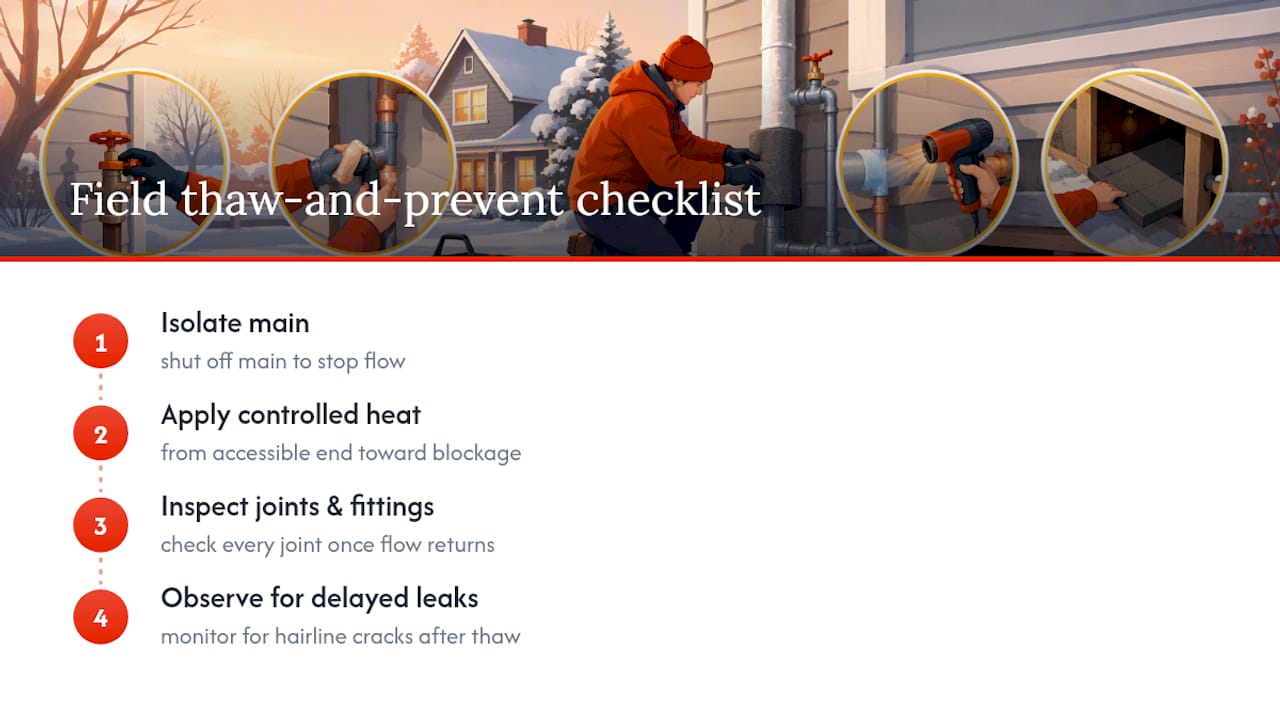
The full version of that field procedure, including timing and what to watch for, is laid out in our 30 to 45 minute thaw safety plan, which walks through the same sequence our techs use on real calls.
Seasonal inspection visits usually turn up the same handful of issues: missing or degraded insulation on exposed runs, a spigot that was never converted to a frost-free type, an aging shut-off valve that's stiff or won't fully close, and pipe runs that could benefit from heat-trace but never got it installed correctly. Catching those before December is far cheaper than fixing a burst pipe in January.
Why Insulation Alone Won't Save You (An Editorial Take)
Homeowners consistently overinvest in pipe insulation and underinvest in the two things that actually prevent most bursts: heat and air sealing. Insulation slows heat loss. It does not produce heat. Wrap a pipe in three inches of foam inside a crawlspace with a broken vent screen and cold air pouring in, and that pipe will eventually match the outdoor temperature anyway, just a little slower.
The mistakes I see most often aren't dramatic. They're a garden hose left connected through December, a main shut-off nobody in the house can locate, or a thermostat dropped to 50°F to save a few dollars during a trip. Those small oversights cause more bursts than genuinely severe cold does. A $15 foam sleeve and an afternoon spent finding your shut-off valve will save you from the vast majority of frozen-pipe repair bills, and if something does go wrong, photograph it before you touch anything, for your own sake with the insurance company.
— Matt
Stop Guessing and Get a Winter-Ready Plumbing Check
Licensed technicians can find the exact spot in a house that's going to freeze before it does. Frozen pipe repair and prevention visits often combine a safety-first thaw for any active freeze with a full walk-through of exposed runs, insulation, and shut-offs, providing written findings and recommended fixes instead of a guess.

If you've had a pipe freeze more than once in the same spot, or you're just tired of dripping faucets every time the forecast turns ugly, that's exactly the kind of recurring problem a proper inspection solves for good. Technicians commonly handle everything from heat-trace cable installation to full water heater pipe insulation, often offered by family-owned, licensed and insured teams that aim to provide transparent, upfront pricing before any work starts. Schedule a plumbing inspection or repair now, while there's still time to fix the problem before the next cold front, not after.
Sources
- Preventing & Thawing Frozen Pipes | American Red Cross
- How to Keep Your Pipes From Freezing and Bursting - Consumer Reports
- Commercial Risk Engineering Bulletin: Winter Weather (IBHS)
- Insulate a gas domestic water heater (DOE job aid)
- Winter Weather Tips (city fact sheet)
FAQ
At What Temperature Do Pipes Freeze Inside a House?
Pipes inside walls or unheated spaces are at real risk during prolonged cold because wall cavities and crawlspaces often run colder than the room around them. That's the gap Red Cross guidance addresses by recommending a 55°F minimum indoor temperature rather than waiting until outdoor conditions look extreme.
How Do You Prevent Pipes From Freezing?
Keep the thermostat at 55°F or higher, insulate and air-seal exposed pipe runs, disconnect and drain outdoor hoses, and let faucets serving vulnerable lines drip slightly during hard freezes. Consumer Reports notes that a pencil-lead-sized trickle is enough to keep water moving and resist freezing in most exposed lines.
Will Frozen Pipes Thaw on Their Own?
Sometimes, if temperatures rise quickly and the freeze is minor, but waiting it out risks a burst you won't notice until water is already leaking behind a wall. Applying controlled heat from an accessible end, as described in our 30 to 45 minute thaw plan, clears the blockage faster and lets you check for cracks before you're dealing with a flood.
Should I Turn Off the Water to the House Before a Freeze?
Shutting off the main isn't necessary for most homes and can actually leave pipes without the moving water that helps resist freezing. It only becomes the right call once a pipe has already burst or you're leaving a property vacant for an extended stretch without maintaining heat, a scenario where insurance policies often expect reasonable care to keep the home heated instead.